 Skip to content

Paint can change the appearance of a room altogether with a new paint. There is no better or affordable way to refresh your environment than through interior painting whether you are updating a space that is tired, a home on sale or incorporating your personality into a new home. By 2025, painting has evolved much further than just through the use of different colors–the current technology, equipment, and aesthetics have made it an actual art form. This ultimate interior painting guide of 2025 will guide you through all the stages of the painting process, explain how to select the correct colours and finishes, prepping walls, choosing tools, painting like a professional, and incorporating the latest trends. This guide will assure you that your next building project, whether you are a DIY home owner or commissioning a professional in design or construction, will be efficient, stylish and perfect. 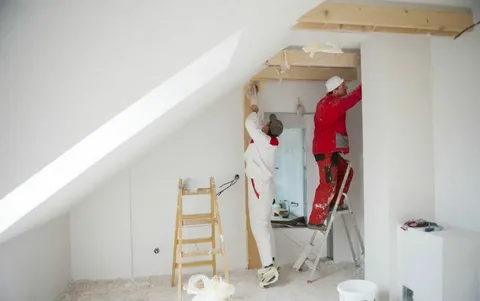
2025 trend: The velvet and matt surface finish is getting its attention by bedroom, and living interiors because of their natural elegant look. 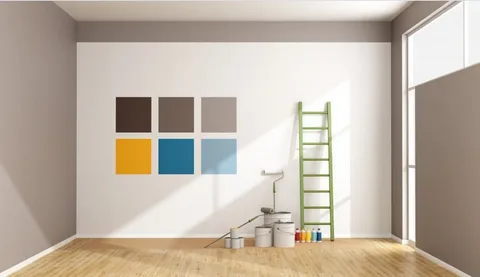
Why Interior Painting Still Reigns Supreme in 2025
Before we get into the how-tos, we should first take a look at the reasons why interior painting remains one of the most popular home improvement projects of 2025:- Affordable impact: Painting produces a high rate of return on the investment with a low cost in comparison to remodeling or replacing fixtures.
- Boosts property value: New acrylic paint in neutral shades can make your house look good and have more appeal to a buyer.
- Health and wellness: Low-VOC and zero-VOC formulas have been developed over the past five years, which offers better air quality at home (and with some brands, longer durability).
- Creative expression: There are new tools and methods of design that allow homeowners to personalize their spaces to an extent that they have never been able to before.
Step 1: Planning Your Interior Paint Project
Assess the Space
Take a walk through the room(s) you intend to have painted. Keep in mind:- Room size and layout
- Natural and artificial lighting
- Existing décor and furniture
- Wall condition (cracks, stains, previous finishes)
Decide on DIY vs. Hiring a Professional
Although most homeowners enjoy the feel of creating something with their own hands via DIY painting, delicate placements/wall height/specialty paints may warrant an expert painter. Lack of time, safety issues or perfectionism can be mitigated with the use of professional interior painting contractors.Step 2: Choosing the Right Interior Paint Color
By 2025, the trends in colour will gravitate towards wellness and bold accent colour and modern neutrals. Favourites include:- Soft earthy greens for calming bedrooms
- Deep navy or charcoal for moody, dramatic dining area
- Warm terracotta and blush for cozy, intimate settings
- Timeless beiges and off-whites for resale appeal
How to Choose the Right Color:
- Use self painted AR which can be used to visualize project colours in a given space.
- Look at paint chips under varying light conditions, morning, afternoon and evening.
- Student, think over the atmosphere you would like to build (relaxed, vibrant, creative, cozy.).
- Blend with the existing furniture and floor as well as the architectural features.
Step 3: Selecting the Best Interior Paint Finish
The kind of finishing of the paint determines the quality of how your walls will look as well as how long they will last. The following is what is on the up in the year 2025:Paint Finishes Explained:
| Finish | Best For | Key Features |
| Flat / Matte | Ceilings, low-traffic walls | Hides imperfections, low reflectivity |
| Eggshell | Living rooms, dining rooms | Slight sheen, easy to clean |
| Satin | Kitchens, bathrooms, hallways | Smooth, durable, stain-resistant |
| Semi-Gloss | Trim, doors, cabinets | High sheen, very durable |
| High Gloss | Accent furniture, modern designs | Reflective, bold, hard-wearing |
Step 4: Gathering the Right Painting Tools
Appropriate tools can be very helpful in the final painting results. Most interior painting will require the following:Essential Painting Tools:
- Constantly needed painting Aids
- Nice paint rollers ( 3/8 inch nap on smooth, 3/4 textured)
- Angulated sash brush edges and corners
- The disposable liners in the paint tray
- Ceiling/High wall extension pole
- Masking tape (low-sticky, surface friendly )
- High-density nylon breaching cloths (canvas or plastic)
- Wall filler repair product
- Sandpaper or sand sponge
- Putty knife
- Ladder or step stool
- Stir sticks and can opener to the paint
- Rags and a pail of water with which he cleans up
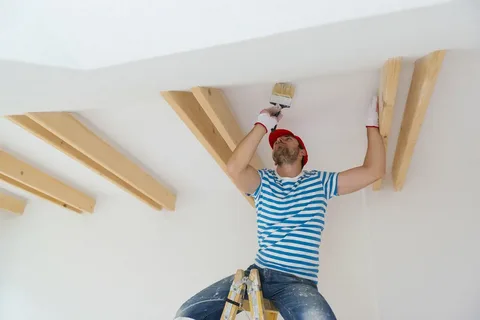
Step 5: Preparing Your Walls for Painting
The right preparation is a must to produce a professional looking outcome. Make time to prepare your walls before you start brushing that can of paint.Wall Prep Checklist:
- Clear all the room or shift the furniture to the middle and cover with the drop cloths.
- Wash the walls with a mild soaping solution to wash and remove oil, dust, and dirt
- Seal the hole or cracks using spackle or wall filler. Let dry and sand smooth.
- Remove outlet covers, switch plates, curtain rods, any hardware.
- During the excavation process one would paint the sand and glossy surfaces to assist in the process of paint sticking.
- Tape the edges of the trim, the windows, the baseboards, and everything you do not want painted.
Priming:
- Apply a primer when painting a dark color, repairing a damaged wall or changing between a glossy finish to matte finish (vice versa).
- High-tech enhancement: Most higher-end paints now contain primer, but where serious problems exist, it is best to apply primer separately.
Step 6: Applying Paint Like a Pro
When you have readied your space and your painting equipment is prepared now you are ready to paint. These essential tricks of the pros will give you an even coverage.Painting Techniques:
- Cut in first: An angled brush does this by applying 2-3 inches along edges, corners and ceilings, then rolling the rest of the wall.
- Use the “W” method: Rub over in the shape of a W and fill in to make sure it is not streaky.
- Maintain a wet edge: Work in small sections to prevent lap marks which are visible.
- Apply two coats: Two coats on most walls will give the whole effect and durability of stained walls.
- Let dry between coats: Wait 24-4 hours (read the paint label) before application of a 2nd coat.
Step 7: Clean Up and Finishing Touches
Towards the end, do not be in a hurry when cleaning up since a strong finish will help nurture success in the long run.Post-Painting Checklist:
- Remove painter tape before paint begins to dry to ensure it does not peel off.
- Clean wash brushes and rollers at once in water with soap (in case of latex paint).
- Keep left over cans of paint to touch-up. Place small labels on each can with the room name on it and the date.
- Natural ventilation of the area will assist paint to dry quicker and get rid of eddies.
- After 24-48 hours reinstall outlet covers, hardware and wall hangings.
Latest Interior Painting Trends in 2025
Interior painting is becoming tech-savvy, sustainable and creative as key motivating factors. Here are the painting trends to note if you are redesigning your space in 2023:Color Drenching
Painting the boundary in a single colour whereas the skin, furniture and such is painted a similar colour creating a striking, immersive effect.Two-Tone Walls
On the bottom and the top half of the wall, use complimentary shade and this is usually separated by the use of a chair rail or a soft fade.Textured Finishes
Channels and carved details can be Venetian plaster, lime wash or suede finish.Sustainable Paint Choices
Eco friendly paint with low VOCs and biodegradable packaging and minimal environmental impact are on the rise.Digital Color Matching
It is now possible to use apps and devices to scan an object or photography and immediately identify matching paint colors-facilitating coordination of catchy design themes.Common Interior Painting Mistakes to Avoid
Even those with experience in doing it yourself can make mistakes But you should be alert to the following:- Condensing surface prep: Will cause a bad adhesion and uneven coatings.
- Applying with cheap brushes or on a roller: Causes streaks and lint in the paint.
- Excessive loading of the roller: Drops and splashing.
- Forgetting dry time will cause smudges and an uneven finish.
- Paint in dull light: May ensure scooped and patchy layers.
- Do it with due care and do not take shortcuts- quality requires a little bit more.
